SKIP TO CONTENT
Worksheet Generator
Subjects
Grades
Worksheets
Games
Build a Worksheet
More Resources
Roly Recommends
Summer Boost
Subjects
Grades
Worksheets
Games
Build a Worksheet
More Resources
Roly Recommends
Summer Boost
Middle School Activities
Filters
29 results
Middle School
✕
Activities
✕
Clear all
29 results
Filters
Middle School
✕
Activities
✕
Subjects
Science
Grade Level
Pre-K
K
1st
2nd
3rd
4th
5th
6th
7th
8th
Early Childhood
Elementary School
Middle School
Resource Type
Worksheets
Games
Lesson Plans
Interactive Worksheets
Workbooks
Activities
Offline Games
Guided Lessons
Teacher Resources
Teacher Editions
Occasion
Earth Day
Holidays
Arts & Crafts
Arts & Crafts
Painting & Drawing
Clear all
View 29 results
Middle School Activities
Filters
29 results
Middle School
✕
Activities
✕
Clear all
29 results
The Limewater Carbon Dioxide Test
Activity
The Limewater Carbon Dioxide Test
Fourth Grade
Physical Science
Kids will conduct a cool limewater carbon dioxide test that can be performed with common household materials to learn about the chemistry of this common gas.
Activity
The Limewater Carbon Dioxide Test
Activity
The Limewater Carbon Dioxide Test
Kids will conduct a cool limewater carbon dioxide test that can be performed with common household materials to learn about the chemistry of this common gas.
Fourth Grade
Physical Science
Activity
Heat Capacity of Water vs. Heat Capacity of Oil
Activity
Heat Capacity of Water vs. Heat Capacity of Oil
Fifth Grade
Physical Science
Students pit the heat capacity of water against the heat capacity of oil while looking at the effects of dipole rotation in this cool science fair project idea.
Activity
Heat Capacity of Water vs. Heat Capacity of Oil
Activity
Heat Capacity of Water vs. Heat Capacity of Oil
Students pit the heat capacity of water against the heat capacity of oil while looking at the effects of dipole rotation in this cool science fair project idea.
Fifth Grade
Physical Science
Activity
Self-Inflating Balloons
Activity
Self-Inflating Balloons
Fourth Grade
Engineering and Science Inquiry
In this science fair project, kids start a chemical reaction that will make a balloon inflate itself!
Activity
Self-Inflating Balloons
Activity
Self-Inflating Balloons
In this science fair project, kids start a chemical reaction that will make a balloon inflate itself!
Fourth Grade
Engineering and Science Inquiry
Activity
Design Challenge: Design a Bouncy Ball
Activity
Design Challenge: Design a Bouncy Ball
Sixth Grade
Engineering and Science Inquiry
In this design challenge, students will be tasked with creating a bouncy ball polymer!
Activity
Design Challenge: Design a Bouncy Ball
Activity
Design Challenge: Design a Bouncy Ball
In this design challenge, students will be tasked with creating a bouncy ball polymer!
Sixth Grade
Engineering and Science Inquiry
Activity
Design Challenge: Design a Roller Coaster
Activity
Design Challenge: Design a Roller Coaster
Sixth Grade
Engineering and Science Inquiry
In this challenge, students are tasked with creating a model roller coaster that a marble can travel through.
Activity
Design Challenge: Design a Roller Coaster
Activity
Design Challenge: Design a Roller Coaster
In this challenge, students are tasked with creating a model roller coaster that a marble can travel through.
Sixth Grade
Engineering and Science Inquiry
Activity
Does Chewing Gum Affect Test Performance?
Activity
Does Chewing Gum Affect Test Performance?
Sixth Grade
Engineering and Science Inquiry
This experiment will evaluate if chewing gum affects students' test performance.
Activity
Does Chewing Gum Affect Test Performance?
Activity
Does Chewing Gum Affect Test Performance?
This experiment will evaluate if chewing gum affects students' test performance.
Sixth Grade
Engineering and Science Inquiry
Activity
Regrow Cabbage: Vegetative Reproduction and Cloning Plants
Activity
Regrow Cabbage: Vegetative Reproduction and Cloning Plants
Sixth Grade
Engineering and Science Inquiry
What is vegetative reproduction? Find out how you can clone plants and regrow cabbage from a stem in this cool experiment!
Activity
Regrow Cabbage: Vegetative Reproduction and Cloning Plants
Activity
Regrow Cabbage: Vegetative Reproduction and Cloning Plants
What is vegetative reproduction? Find out how you can clone plants and regrow cabbage from a stem in this cool experiment!
Sixth Grade
Engineering and Science Inquiry
Activity
Determine the Effect of Gray Water on Plant Growth
Activity
Determine the Effect of Gray Water on Plant Growth
Fifth Grade
Engineering and Science Inquiry
Does putting soapy water on plants help or hinder plant growth? Kids learn about greywater and how it affects plant growth in this cool science fair project.
Activity
Determine the Effect of Gray Water on Plant Growth
Activity
Determine the Effect of Gray Water on Plant Growth
Does putting soapy water on plants help or hinder plant growth? Kids learn about greywater and how it affects plant growth in this cool science fair project.
Fifth Grade
Engineering and Science Inquiry
Activity
Do Screen and Text Color Affect Retention?
Activity
Do Screen and Text Color Affect Retention?
Fourth Grade
Engineering and Science Inquiry
This project examines if computer screen and text color affect retention and if people subconsciously prefer combinations of colors that help their retention.
Activity
Do Screen and Text Color Affect Retention?
Activity
Do Screen and Text Color Affect Retention?
This project examines if computer screen and text color affect retention and if people subconsciously prefer combinations of colors that help their retention.
Fourth Grade
Engineering and Science Inquiry
Activity
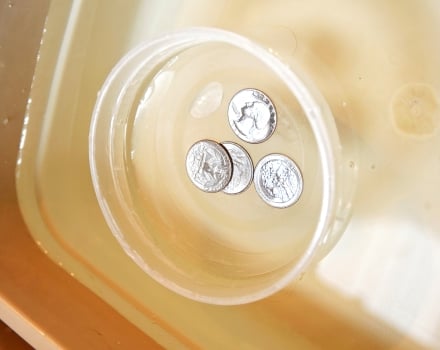
Buoyant Force of Water
Activity
Buoyant Force of Water
Sixth Grade
Engineering and Science Inquiry
The buoyant force of water explains why some objects float in water. But why do some objects sink? Find out in this physics experiment and learn about density.
Activity
Buoyant Force of Water
Activity
Buoyant Force of Water
The buoyant force of water explains why some objects float in water. But why do some objects sink? Find out in this physics experiment and learn about density.
Sixth Grade
Engineering and Science Inquiry
Activity
Growing Plants in Garbage
Activity
Growing Plants in Garbage
Fifth Grade
Engineering and Science Inquiry
Science fair project which determines whether plants are able to get enough nutrients from different types of garbage.
Activity
Growing Plants in Garbage
Activity
Growing Plants in Garbage
Science fair project which determines whether plants are able to get enough nutrients from different types of garbage.
Fifth Grade
Engineering and Science Inquiry
Activity
Walking in Circles
Activity
Walking in Circles
Sixth Grade
Engineering and Science Inquiry
This project will explore whether test subjects, deprived of points of reference, will, in attempting to walk a straight course, walk in circles.
Activity
Walking in Circles
Activity
Walking in Circles
This project will explore whether test subjects, deprived of points of reference, will, in attempting to walk a straight course, walk in circles.
Sixth Grade
Engineering and Science Inquiry
Activity
Bicycle Water Bombs: Hitting a Target from a Moving Object
Activity
Bicycle Water Bombs: Hitting a Target from a Moving Object
Sixth Grade
Engineering and Science Inquiry
This project examines Newton's First and Second Laws of Motion with a bicycle and water balloons.
Activity
Bicycle Water Bombs: Hitting a Target from a Moving Object
Activity
Bicycle Water Bombs: Hitting a Target from a Moving Object
This project examines Newton's First and Second Laws of Motion with a bicycle and water balloons.
Sixth Grade
Engineering and Science Inquiry
Activity
Does Music Affect Your Mood?
Activity
Does Music Affect Your Mood?
Sixth Grade
Engineering and Science Inquiry
This project explores whether there is an effect on people, including heart rate and self-expressed mood, when they are exposed to different types of music.
Activity
Does Music Affect Your Mood?
Activity
Does Music Affect Your Mood?
This project explores whether there is an effect on people, including heart rate and self-expressed mood, when they are exposed to different types of music.
Sixth Grade
Engineering and Science Inquiry
Activity
The Science of Sleep: Testing Dream Recall
Activity
The Science of Sleep: Testing Dream Recall
Sixth Grade
Engineering and Science Inquiry
This experiment explores the question of whether age and/or gender play a role in people's ability to remember dreams.
Activity
The Science of Sleep: Testing Dream Recall
Activity
The Science of Sleep: Testing Dream Recall
This experiment explores the question of whether age and/or gender play a role in people's ability to remember dreams.
Sixth Grade
Engineering and Science Inquiry
Activity
Design Challenge: Balloon Car
Activity
Design Challenge: Balloon Car
Sixth Grade
Engineering and Science Inquiry
In this challenge, students are tasked with creating a car that can be powered by a balloon!
Activity
Design Challenge: Balloon Car
Activity
Design Challenge: Balloon Car
In this challenge, students are tasked with creating a car that can be powered by a balloon!
Sixth Grade
Engineering and Science Inquiry
Activity
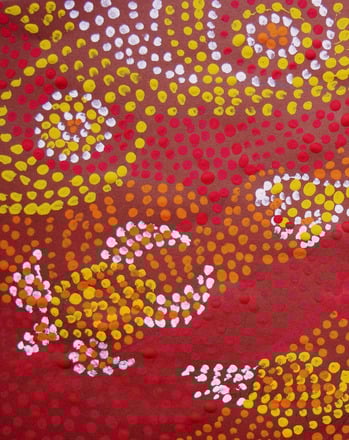
Aboriginal Dot Painting
Activity
Aboriginal Dot Painting
Fourth Grade
Create your own version of an Aboriginal Australian dot painting in this fun activity!
Activity
Aboriginal Dot Painting
Activity
Aboriginal Dot Painting
Create your own version of an Aboriginal Australian dot painting in this fun activity!
Fourth Grade
Activity
The Spinning Sprinkler
Activity
The Spinning Sprinkler
Sixth Grade
Engineering and Science Inquiry
Science fair project the demonstrates Newton's Third Law using a milk carton filled with water.
Activity
The Spinning Sprinkler
Activity
The Spinning Sprinkler
Science fair project the demonstrates Newton's Third Law using a milk carton filled with water.
Sixth Grade
Engineering and Science Inquiry
Activity
Stay Healthy!
Activity
Stay Healthy!
Sixth Grade
Kids think of 25 ways to live healthier, more active lives and come up with a plan to put into action in this middle school heath activity.
Activity
Stay Healthy!
Activity
Stay Healthy!
Kids think of 25 ways to live healthier, more active lives and come up with a plan to put into action in this middle school heath activity.
Sixth Grade
Activity
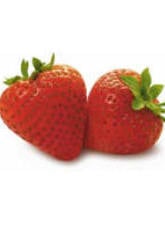
Extracting DNA from Strawberries
Activity
Extracting DNA from Strawberries
Sixth Grade
Engineering and Science Inquiry
This middle school science fair project determines whether DNA is most easily extracted from under-ripe, ripe, or over-ripe strawberries.
Activity
Extracting DNA from Strawberries
Activity
Extracting DNA from Strawberries
This middle school science fair project determines whether DNA is most easily extracted from under-ripe, ripe, or over-ripe strawberries.
Sixth Grade
Engineering and Science Inquiry
Activity
Identifying Rocks and Minerals
Activity
Identifying Rocks and Minerals
Fifth Grade
Engineering and Science Inquiry
Check out this cool science fair project on identifying rocks and minerals for kids.
Activity
Identifying Rocks and Minerals
Activity
Identifying Rocks and Minerals
Check out this cool science fair project on identifying rocks and minerals for kids.
Fifth Grade
Engineering and Science Inquiry
Activity
Design Challenge: Insulate a Cup
Activity
Design Challenge: Insulate a Cup
Sixth Grade
Engineering and Science Inquiry
In this challenge, students are tasked with creating an insulated cup that will keep beverages colder for longer than a regular cup.
Activity
Design Challenge: Insulate a Cup
Activity
Design Challenge: Insulate a Cup
In this challenge, students are tasked with creating an insulated cup that will keep beverages colder for longer than a regular cup.
Sixth Grade
Engineering and Science Inquiry
Activity
What is the Most Effective Winter Coat Insulation?
Activity
What is the Most Effective Winter Coat Insulation?
Sixth Grade
Engineering and Science Inquiry
Science fair project which identifies the most effective insulator that you could use to make a winter coat by comparing how well cloth and cotton trap heat.
Activity
What is the Most Effective Winter Coat Insulation?
Activity
What is the Most Effective Winter Coat Insulation?
Science fair project which identifies the most effective insulator that you could use to make a winter coat by comparing how well cloth and cotton trap heat.
Sixth Grade
Engineering and Science Inquiry
Activity
Symbiosis: Plants, Nitrogen, and Bacteria
Activity
Symbiosis: Plants, Nitrogen, and Bacteria
Sixth Grade
Engineering and Science Inquiry
In science fair projects, middle school students discover why nitrogen fixing bacteria are important to plant growth.
Activity
Symbiosis: Plants, Nitrogen, and Bacteria
Activity
Symbiosis: Plants, Nitrogen, and Bacteria
In science fair projects, middle school students discover why nitrogen fixing bacteria are important to plant growth.
Sixth Grade
Engineering and Science Inquiry
Activity
Does a Candle's Temperature Affect Its Burn Rate?
Activity
Does a Candle's Temperature Affect Its Burn Rate?
Sixth Grade
Engineering and Science Inquiry
This experiment investigates the relationship between the temperature of a candle and its burn rate.
Activity
Does a Candle's Temperature Affect Its Burn Rate?
Activity
Does a Candle's Temperature Affect Its Burn Rate?
This experiment investigates the relationship between the temperature of a candle and its burn rate.
Sixth Grade
Engineering and Science Inquiry
Activity
How Does Noise Affect Coordination?
Activity
How Does Noise Affect Coordination?
Sixth Grade
Engineering and Science Inquiry
This experiment evaluates if a noisy environment makes it harder for test subjects to perform tasks that require hand-eye coordination.
Activity
How Does Noise Affect Coordination?
Activity
How Does Noise Affect Coordination?
This experiment evaluates if a noisy environment makes it harder for test subjects to perform tasks that require hand-eye coordination.
Sixth Grade
Engineering and Science Inquiry
Activity
Is Coffee an Addiction?
Activity
Is Coffee an Addiction?
Sixth Grade
Engineering and Science Inquiry
What happens when "coffee-addicts" miss coffee for 1 day? Find out in this science fair project idea!
Activity
Is Coffee an Addiction?
Activity
Is Coffee an Addiction?
What happens when "coffee-addicts" miss coffee for 1 day? Find out in this science fair project idea!
Sixth Grade
Engineering and Science Inquiry
Activity
Counting Sunspots
Activity
Counting Sunspots
Sixth Grade
Engineering and Science Inquiry
In this project, you will observe and record changes in sunspots over two weeks.
Activity
Counting Sunspots
Activity
Counting Sunspots
In this project, you will observe and record changes in sunspots over two weeks.
Sixth Grade
Engineering and Science Inquiry
Activity
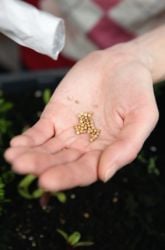
Do Packaged Seeds Expire?
Activity
Do Packaged Seeds Expire?
Fourth Grade
Engineering and Science Inquiry
Find out whether packaged seeds actually do expire in this new science fair project idea.
Activity
Do Packaged Seeds Expire?
Activity
Do Packaged Seeds Expire?
Find out whether packaged seeds actually do expire in this new science fair project idea.
Fourth Grade
Engineering and Science Inquiry
Activity
1