

Activity
Fingerpaint Flamingo

If you’re tired of seeing little handprints all over the walls, put them to better use with this cute, bird-themed craft! Everyone remembers the 1st grade “hand turkey” project every year at Thanksgiving — why not try your “hand” year-round at blue herons, ostriches or flamingos?
Related learning resources
Flamingo Fun: Practice Two-Digit Subtraction
Interactive Worksheet
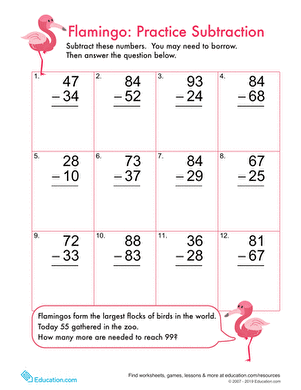
Flamingo Fun: Practice Two-Digit Subtraction
Subtraction by borrowing can seem complicated, but with a help from this cheerful flamingo-filled worksheet, your child will be a borrowing pro in no time!
2nd Grade
Math
Interactive Worksheet

Underwater Subtraction #7
Worksheet
Underwater Subtraction #7
Get your second grader to practice subtraction alongside a pretty pink flamingo!
2nd Grade
Worksheet
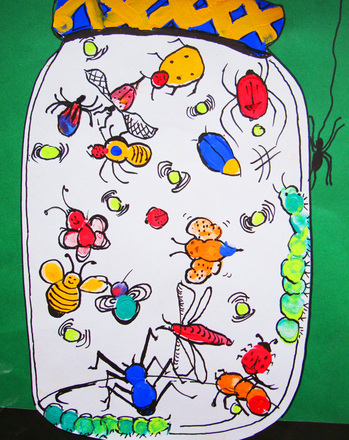
Paint Thumbprint Bugs in a Jar
Activity
Paint Thumbprint Bugs in a Jar
...painting, fingerpaint, insects, bugs, science, nature, art, paint, thumbprint, drawing...
2nd Grade
Activity
