Activity
Personalized Recipe Book

Does your child have some creativity brewing? Encourage her cooking exploration by helping her make a special recipe book to consult in the kitchen. This homemade cookbook is eye-catching, simple to construct and perfect for holding all of the instructions to whipping up her favorite foods. There's no better way to spark and hold her interest in cooking!
Related learning resources

Social Media Book Review
Activity
Social Media Book Review
Teach your child the art of the status update with this cutting-edge take on the old-fashioned book report: the social media book review!
5th Grade
Activity
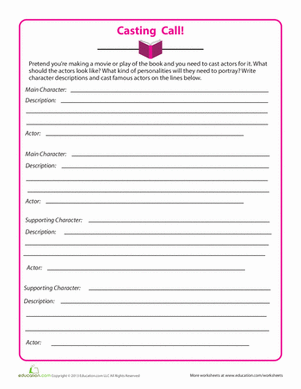
Book Casting Call
Worksheet
Book Casting Call
Assemble your favorite actors and find the perfect parts for them in your summer reading book.
5th Grade
Worksheet

Writing Book Reviews
Worksheet
Writing Book Reviews
This worksheet will help your child organize the details needed to write about a book they've read!
4th Grade
Worksheet