Activity
Tissue Paper Prints

Print making is a fun way to learn about the artistic process and the math concept of multiples. Make multiple images in just minutes with this activity that has your child create a tissue-paper printing plate. Create a picture or a unique design by gluing brightly colored tissue paper to cardboard, then transferring it to a water soaked paper print.
Tissue paper printing is just one way to learn about the art of print. This simple activity requires fewer materials (and often less mess) than more traditional ink based methods. Additionally, this activity serves as a fun collage project, and your child will also be creating a stunning tissue paper collage that can be kept long after printing use.
Related learning resources
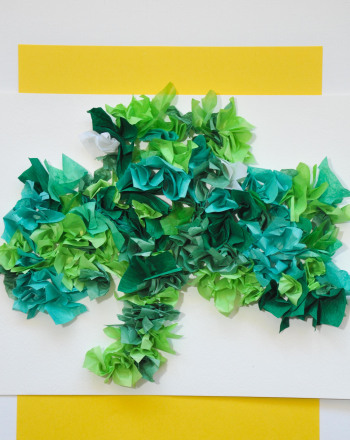
Tissue Paper Clover
Activity
Tissue Paper Clover
Patrick's Day by creating this textured clover made from tissue paper.
2nd Grade
Activity

Flower Prints
Activity
Flower Prints
Take advantage of the spring and summer sun in this arts and crafts activity that has your learner creating pretty flower prints.
Science
Activity

Easter Egg Prints
Activity
Easter Egg Prints
...
Easter, Easter eggs, painting, prints, nature activity...
2nd Grade
Activity