Activity
Grow Slime Mold
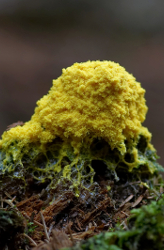
Slime mold is made up of organisms that resemble amoebas (single-celled organisms with no definite shape) and can easily be described as “blobs.” They move around looking for food and avoiding predators. They need food and water to live, and like cool, dark places. They are common in forests and wooded areas, and easy to spot once you know what you are looking for. The slime mold in this experiment is actually made up of many of these single-celled organisms that work together to find food and avoid threats to survival. They eat a variety of things and are useful decomposers. This group of molds used to be classified as fungi (like mushrooms), but are no longer listed in this kingdom; scientists have a hard time agreeing what slime molds actually are!
Some slime molds reproduce asexually using spores, much like fungi, but other kinds reproduce sexually, fusing gamete cells to form zygotes (the earliest stage of an embryo). Now both types of slime molds (plasmodial slime mold and cellular slime mold) are classified in the Amoebozoa kingdom. Plasmodial slime molds are singular giant cells, while cellular slime molds are single cells that come together and act as a single unit. In this experiment, you will observe cellular slime mold cells acting together and searching for food.
Problem
Grow slime mold in different conditions
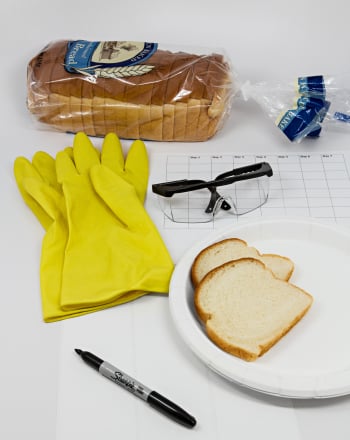
Materials
- Petri dish
- 2 pie-sized dishes with clear lids
- Paper towel
- Distilled water
- 1-ft length of rubber tubing
- Scissors
- Rubber or Nitrile gloves
- Slime mold samples (Physarium polycephalum and Mxzomycophyta, collected from a wooded area or bought from a science supplier)
- Uncooked rolled oats
- Colored pencil
- Eye dropper
- Different cereals and/or fruit (for slime mold food)
- Vinegar and/or nail polish remover (to add as a toxin)
Procedure
Set up for your experiment:
- Wear rubber or nitrile gloves to prevent contamination of your set up.
- Cut three one-inch lengths of rubber tubing, and then cut down the length of the tubing so they are open circles.
- Fit the tubing pieces around bottom of the pie dish as shown in the diagram.
- Place the petri dish inside the pie dish.
- Cut out a circle of paper towel larger than the petri dish and lay it on top of the petri dish.
- Wet the paper towel thoroughly with distilled water.
- Place the clear lid of the pie dish over the set up.

Grow the mold!:
- Place a sample of the slime mold on the paper towel with a drop of water.
- Once the slime mold is rehydrated and moving around, place an uncooked oat in contact with it.
- Keep the dish covered whenever you are not feeding the mold.
- Once the mold starts to grow larger, place more uncooked oats in its path and watch it grow!
- Keep the paper towel moist (you can use a spray bottle filled with distilled water to mist the paper towel).
- Throughout the experiment, take pictures of the mold or make sketches to document the life of the mold. Use the colored pencils to note any color or size changes. Record your observations.
Experiment!:
- On different trials, try using different cereals or fruit to feed the molds. What helps the mold grow best? What foods do the molds prefer?
- On other trials, try added small drops of toxins, like vinegar or nail polish remover. What happens? Why?
Results
Slime mold will grow and move around in search of nutrients and to avoid toxic substances.
Why?
Slime mold moves very similarly to an amoeba, crawling towards food and growing as the cells ingest it. Slime mold cells prefer to live on upright structures, like trees and plants, and tend to grow upward until food is reached. They leave behind a trail dead cells as they travel. As they grow, they can become very large and move quite quickly to a food source. One remarkable thing about cellular slime molds is that if chunks of the larger unit get separated, they can secrete chemicals to find each other once again.
Their ability to use chemical signals is also useful in that slime molds often know to avoid harmful chemicals or other things that could be detrimental to their health, like light. Light can dry out the molds and not allow them to move around. Slime molds have demonstrated learning behavior by using chemical signals to avoid things that have harmed cells in the past.
Education.com provides the Science Fair Project Ideas for informational purposes only. Education.com does not make any guarantee or representation regarding the Science Fair Project Ideas and is not responsible or liable for any loss or damage, directly or indirectly, caused by your use of such information. By accessing the Science Fair Project Ideas, you waive and renounce any claims against Education.com that arise thereof. In addition, your access to Education.com's website and Science Fair Project Ideas is covered by Education.com's Privacy Policy and site Terms of Use, which include limitations on Education.com's liability.
Warning is hereby given that not all Project Ideas are appropriate for all individuals or in all circumstances. Implementation of any Science Project Idea should be undertaken only in appropriate settings and with appropriate parental or other supervision. Reading and following the safety precautions of all materials used in a project is the sole responsibility of each individual. For further information, consult your state's handbook of Science Safety.
Related learning resources