Activity
Joule Heating: Resistance vs. Temperature

For some reason, your laptop charger gets super hot when you plug it in.
It had recently stopped working, and so you left it with a friend who claimed to know how to fix it. He said that all he’d need to do would be to swap out a broken resistor with a replacement—but he also mentioned that he replaced the charger’s resistor with a resistor with a lower value of resistance. His reasoning was that it would make your laptop charge faster. For this same reason, he also cranked up the voltage that travels through the charger, and now you’re sitting home with a laptop charger that feels like it could burn a hole through your couch.
Let’s do an experiment to get to the bottom of how your friend’s executive decisions probably contributed to your dangerously hot laptop charger!
Problem
Explore joule heating and explain resistance vs. temperature.
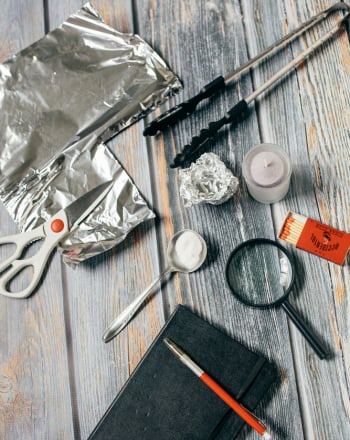
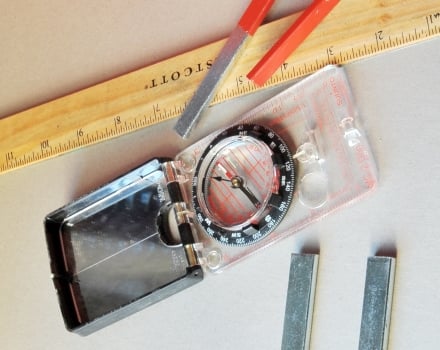
Materials
- Freezer
- Ice cube tray
- Cutting board
- Tape
- 2 10-ohm, 10 watt resistors
- 2 1000-ohm resistors
- 9-volt battery
- AA battery
- Ammeter (optional)
- 2 wires with insulation removed from both ends
Procedure
- On the day before you perform your experiment, place a resistor in the bottom of each individual ice cube compartment in your ice cube tray. Bend the wires so that they poke out over the top of the tray like the prongs of a fork: they should lean against one side of the slot and stick out of the tray by at least ¼ inch. Fill the tray with water and leave it in your freezer overnight.
- Tape two wires to your cutting board. The wires should be bent 90 degrees at one end, laying flat and not quite touching. Don’t tape over the ends—leave them exposed so we can hook them up to our resistors. The other ends should stick over the edge of the cutting board by about 2 inches. Bend these ends inward so that they can clamp around your battery when you place it in between them.
- Repeat step 2 to set up another test station (you can use the same cutting board if you want, just make sure you space them out). This way, you’ll have two sets of wires ready for resistors.
- Hook each battery up to the wires in a test station. Make sure that the wires aren’t touching—we don’t want to complete a circuit yet!
- Gather all your materials and remove your ice tray from the freezer. Remove the cubes with the 1000-ohm resistors first. Place each so that the prongs sit under the bent wires on the cutting board, completing each circuit. What do you think will happen?
- After one minute, remove the 1000-ohm resistors and replace them with the 10-ohm resistors. Observe. Remove the 10-ohm resistors after one minute. What do you think will happen this time? Why?
Extra: Attach the ammeter to your circuit and look at how much current flows when the resistors are in the ice vs. when they aren’t. What do you observe?
Results
Your 10-ohm resistor melted the ice! However, the AA battery didn’t melt it nearly as quickly as the 9-Volt battery did.
Why?
You’re witnessing a phenomenon called joule heating. Joule heating is what happens when you run current through anything that has a resistance (which is really everything, except superconductors!). It’s what makes electric toasters work, and it’s the reason computers need fans to keep them cool. Joule heating is proportional to the voltage squared divided by the resistance. What this means is that higher voltages increase the amount of heat by a lot, and lower resistances will increase the heat as well. When circuit elements get hot, their resistance goes up, which also reduces the amount of current that can pass through them. Your friend was right, in a sense, that lower resistance would let your laptop charge faster—but he didn’t account for how much it would heat up.
Joule heating happens when the electrons hit ions (charged atoms) in the material as they travel along the circuit. The 1.5 Volt AA battery you attached to your circuit would move the electrons at over 1,500,000 meters per second, if they weren’t running into anything. That’s fast enough to go around the entire world in twenty five seconds! However, electrons do bump into things and get scattered. This is basically what accounts for resistance.
When the electrons bump into the ions, they cause the ions to vibrate. This is the source of heat you see in your circuit—in fact, temperature is just a number that quantifies this molecular vibration (heat). When your friend put in a lower resistor and increased the voltage of your charger they made the resistor give off much more heat than the charger was built for. The reason a lower resistance increases the Joule Heating is because there’s much more current (electrons) flowing through the material, and thus many more collisions between electrons and ions in the resistor.
Superconductors are special materials that have no resistance. Therefore, they produce almost no joule heating! These materials are essential for technologies like particle accelerators, magnetic levitation trains, and magnetic resonance imaging. They would be amazingly useful for consumer electronics if it weren’t for the fact that they need to be super cold to work–some need to be under -130 degrees Celsius!
Education.com provides the Science Fair Project Ideas for informational purposes only. Education.com does not make any guarantee or representation regarding the Science Fair Project Ideas and is not responsible or liable for any loss or damage, directly or indirectly, caused by your use of such information. By accessing the Science Fair Project Ideas, you waive and renounce any claims against Education.com that arise thereof. In addition, your access to Education.com's website and Science Fair Project Ideas is covered by Education.com's Privacy Policy and site Terms of Use, which include limitations on Education.com's liability.
Warning is hereby given that not all Project Ideas are appropriate for all individuals or in all circumstances. Implementation of any Science Project Idea should be undertaken only in appropriate settings and with appropriate parental or other supervision. Reading and following the safety precautions of all materials used in a project is the sole responsibility of each individual. For further information, consult your state's handbook of Science Safety.
Related learning resources