Activity
Rates of Photosynthesis

Grade Level: 7th - 12th; Type: Life Science
Objective:
Student compares the rates of photosynthesis for various light sources.
Research Questions:
- What is photosynthesis and how does it work?
- What type of light is needed by plants for photosynthesis?
- Which wavelengths of light are needed by plants for photosynthesis?
- Which wavelengths of light are given off by incandescent light bulbs?
- Which wavelengths of light are given off by fluorescent light bulbs?
- Which wavelengths of light are given off by halogen light bulbs?
Leaves float in water due to oxygen gas inside the leaf. Photosynthesis produces oxygen as a byproduct when water is split during the light dependent reactions. In this experiment, the student will punch out small disks of leaves and infiltrate their tissue with a baking soda solution. This process will pull gases out of the leaf disks and cause them to sink in solution. The baking soda will also provide the leaf with the carbon dioxide that it needs for photosynthesis. The student will measure the rate of photosynthesis as a function of the number of leaf disks that begin to float throughout the experiment while exposed to light.
Materials:
- Baking soda
- Liquid Soap
- Plastic syringe (10 cc or larger without a needle)
- Spinach or other leaves
- Single hole punch or stiff straw
- Small transparent plastic cups
- Timer
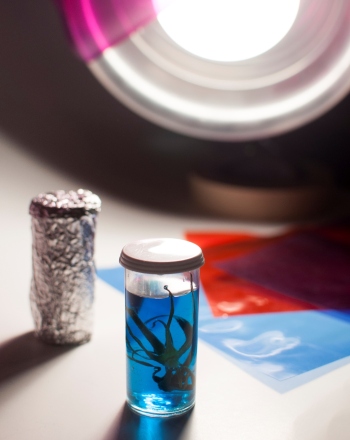
- Light sources: incandescent, fluorescent, natural, halogen, etc.
Experimental Procedure:
- Create your hypothesis as to which type of light will be best for photosynthesis and why. Prepare for the experiment by creating an infiltration solution. Combine 1 L of water with ½ teaspoon of baking soda and 3-4 drops of liquid soap. Next, punch leaf disks from healthy green spinach leaves. You will need 10 disks for each trial of 3 trials of each light source, with a total of about 90-120 disks. Use the hole punch or straw to cut the disks. Avoid major leaf veins or leaves that do not appear fresh and healthy.
- Take the plunger out of the syringe. Place the first 10 leaf disks into the syringe. Reinsert the plunger and carefully draw about 8 mL of infiltration solution into the syringe. Hold the syringe upright as you carefully depress the plunger to allow any air to escape. Place your finger over the tip of the syringe and depress the plunger again, creating a vacuum that will push infiltration solution into the leaf disks. Repeat no more than 2-3 times until the leaf disks have all sunk to the bottom. Put the contents of the syringe into a plastic cup. Add more solution to create a depth of about 3 cm in the cup. Repeat two more times to create three cups for to test the first type of light.
- Place the cups under the first light source at a distance of 25 cm. Turn on the light and start the timer at the same time. At the end of each minute, record the number of disks floating in each cup and swirl the cups slightly to make sure no disks are stuck to the sides of the cups. Continue the experiment until all disks are floating.
- Repeat the entire procedure for each light source you are testing. Record your data. Graph your data and compare your results to your hypothesis to draw conclusions about the experiment.
Terms/Concepts: Photosynthesis; Cellular respiration; Incandescent light; Visible light spectrum; Fluorescent light; Halogen light
References:
Education.com provides the Science Fair Project Ideas for informational purposes only. Education.com does not make any guarantee or representation regarding the Science Fair Project Ideas and is not responsible or liable for any loss or damage, directly or indirectly, caused by your use of such information. By accessing the Science Fair Project Ideas, you waive and renounce any claims against Education.com that arise thereof. In addition, your access to Education.com's website and Science Fair Project Ideas is covered by Education.com's Privacy Policy and site Terms of Use, which include limitations on Education.com's liability.
Warning is hereby given that not all Project Ideas are appropriate for all individuals or in all circumstances. Implementation of any Science Project Idea should be undertaken only in appropriate settings and with appropriate parental or other supervision. Reading and following the safety precautions of all materials used in a project is the sole responsibility of each individual. For further information, consult your state's handbook of Science Safety.
Related learning resources