Activity
Pine Cone Decorations

Pine cone decorations are fun and festive for the winter season and Christmas holiday. When autumn arrives, there's no shortage of pine cones falling off of trees. Rather than ask the kids to rake them up and throw them away, why not turn these little cones into something beautiful and useful for the holiday mantel or the Christmas tree?
This holiday pine cone decorations craft only requires a few pine cones, some paint and glue and a few cotton balls. The result—either a whimsical mini Christmas tree or a series of ornaments—will certainly spruce up your holiday decorations. And the best part is, the kids will look forward to raking up the pine cones! Make pine cone decorations with your child to celebrate the beauty of winter.
Related learning resources
Build a Pine Cone Bird Feeder!
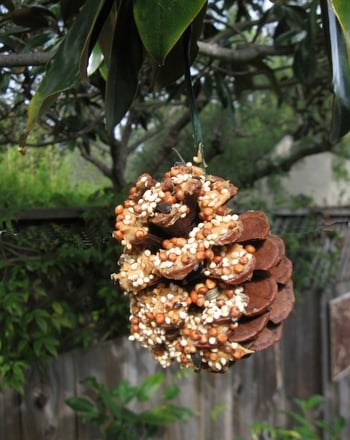
Activity
Build a Pine Cone Bird Feeder!
...
When this pine cone is pecked clean, make another!...
Kindergarten
Science
Activity

Christmas Door Decorations
Worksheet
Christmas Door Decorations
Christmas door decorations brighten any home with holiday cheer. Put Christmas door decorations on your door knobs to bring jolly Christmas spirit to your home.
Kindergarten
Worksheet
Recipes for Kids: Fruit Cone
Activity
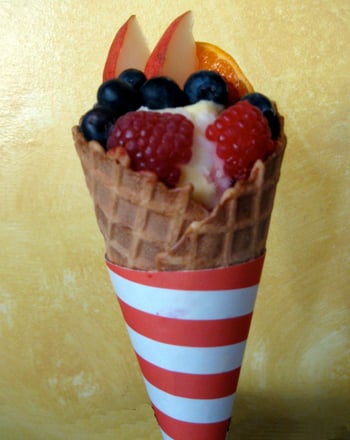
Recipes for Kids: Fruit Cone
Encourage your child to eat nutritiously by having them build this delicious summer fruit cone!
Preschool
Activity