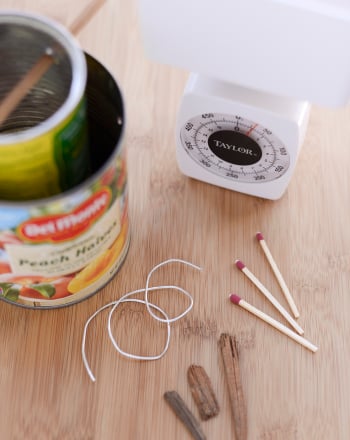
Activity
Wood Stamps
Every kid loves stamps, whether they receive them for good grades on their homework or use it to make designs in their artwork. Here's an activity that lets your child create her very own stamp. Inspired by the Japanese woodcut, your child will create a raised design on a block of wood with only string and glue to create a unique and personalized stamp she can use on everything!
Grade
Subject
Thank you for your input.
What You Need:
- A block of wood, more than 1/2" thick (Outside dimensions can vary, but remember the surface will determine the size of the print and you'll also want to be able to pick it up by the edges.)
- Newspapers to protect your work surface
- Pencil
- Permanent marker
- String
- White liquid glue (school or craft)
- Ink for print-making, found at any art or hobby store
- Paper, fabric, or wood to print on
- Water to clean your stamp
- Paintbrush
- Colored pencils or crayons
What You Do:
- Before you set out to make your own stamps, lay down newspapers to protect your work surface.
- Create your stamp by gluing a piece of paper to your block of wood.
- With a pencil, draw a design on the paper. It should have strong outlines as these lines will be the part that will leave a print.
- Use a permanent magic marker to draw over and darken your design.
- Glue your string over your design outlines. Keep the string as close to the lines as possible. Let this dry completely.
- Now use the tip of the glue nozzle to lay down a thin line of glue over the string outline. The dried glue will be what makes the print. If the glue spreads too much, your outline will be fat when you stamp your design. Let this dry until the glue is transparent.
- Use your paintbrush to paint the glue-covered string. You can also ink your stamp on a stamp pad if you have one that's the correct size. Work quickly enough so that the ink doesn’t dry before you can apply the stamp.
- Take your inked stamp, and stamp your design onto a nice piece of paper or fabric. Let it dry.
- Carefully color the inside of your design with colored pencils and crayons. If you are using this on fabric make sure you use fabric or textile paint.
With your custom built “stamp", you can now create originals designs for greeting cards, repeat motifs for wrapping paper, or decorate your own unique tee-shirts or pillowcases!
Did You Know?
- Japanese woodcuts were first used around 800 years ago.
- Woodcuts make art when a raised surface is inked and pressed against paper. Sometimes the woodcut is put into a press and paper is rolled over it, but each time a print is made the woodcut has to be re-inked. This is a much faster method of creating many copies of the same image than by drawing or painting them one at a time.
- In a traditional woodcut, the cut is made by cutting out the negative space. This activity is the opposite in that it has you raising the design's outline higher than the background to create a positive space.
- One of the most famous Japanese artists, Hokusai, created a series of woodcuts called 36 Views of Mount Fuji.
- Hokosai's best-known work, which you may have seen copies or imitations of, is called “The Great Wave.”
Related learning resources
All About Wood
Science project
All About Wood
This science project has students collect wood samples and invent new uses for different types of wood based on its properties.
Middle school
Science project
Superstitions: Ideas for Writing
Workbook
Superstitions: Ideas for Writing
No need to knock on wood, this book just takes a page from common superstitions to give kids great writing practice! They can consider some origins as they read and write about different beliefs.
4th grade
Reading & Writing
Workbook
Writing Prompt: Ogre in the Woods
Worksheet
Writing Prompt: Ogre in the Woods
What if you came upon a monster in the woods? Have your little writer use their imagination to create a story based on this scene!
5th grade
Reading & Writing
Worksheet
Reading: The Wind in the Willows
Worksheet
Reading: The Wind in the Willows
Embark on an adventure through the woods with the Mole, in this excerpt from Kenneth Grahame's charming book, The Wind in the Willows.
5th grade
Reading & Writing
Worksheet
Boat Racer
Activity
Boat Racer
...What You Need:
Hammer
2 long nails
Small, thin wood strip
Piece of wood approximately 4” by 3”
Large flat rubber band
Piece of sandpaper...
5th grade
Arts & crafts
Activity
Is Horse Manure a Possible Energy Source in a Crisis?
Science project
Is Horse Manure a Possible Energy Source in a Crisis?
...Materials
Dry horse manure
Wood from a coniferous (evergreen) tree
Wood from a deciduous tree (birch, beech, maple, cherry, or alder)
Kitchen scale that measures...
5th grade
Science project
Sentence Building: Homophones
Game
Sentence Building: Homophones
...Wood or would? Help Floyd build brick by brick with in this sentence building game that focuses on homophones....
5th grade
Reading & Writing
Game
Make String Art
Activity
Make String Art
...Place a magazine under the wood base to ensure his nails won't pound through the work table....
5th grade
Arts & crafts
Activity
Make Feather Earrings
Activity
Make Feather Earrings
...Have her pick two colorful wood beads to go with the feather colors that she picked. She will need one bead for each earring....
5th grade
Arts & crafts
Activity
What is Biodiversity?
Science project
What is Biodiversity?
...Arrange the pieces of wood in a square with the edges overlapping. Place a nail in each corner to attach the wood together....
5th grade
Science project
Bernoulli's Principle Experiment
Science project
Bernoulli's Principle Experiment
...Support the wood on either side on two chairs of identical height. Place your carpenter’s level on top of the wood once you’ve balanced it....
5th grade
Science project
Make an African Mask
Activity
Make an African Mask
...The face should divide down the middle with wood veneer on one side and the paper showing through on the other....
5th grade
Arts & crafts
Activity