What You Need:
- Fishing tackle box or a large, sturdy shoebox
- White hobby paint or acrylic paint found in any craft store
- Small paintbrush
- Fine-point, permanent marker
- Rocks
- Paper or journal
- Pen
What You Do:
- Begin with the obvious—gather some rocks! Look in the yard, the driveway, the woods, and the park. Your child only needs a few to get started. The fun part is collecting more over time.
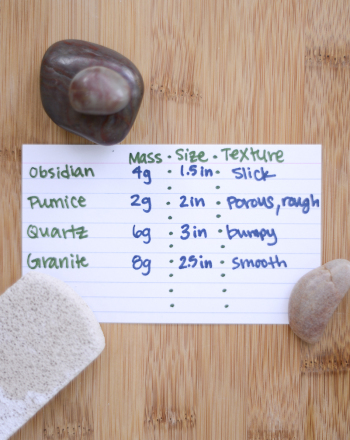
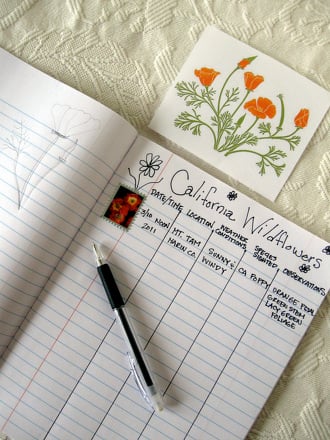
- Have your child create a chart to keep track of her rocks. The chart should include the specimen number, the name and type of the rock, where and when it was obtained, and extra space for important notes about the rock. If your child likes, she can keep this chart and her notes in a journal or binder.
- Have your child label each rock with a specimen number. Paint a small dot of white paint on the rock and allow to dry. Use the marker to write a number in the center of the paint dot.
- Identify the rocks collected. There are a variety of tests you and your child can use to identify the rocks. (See below for helpful tips.)
- Store the rocks away from heat sources in a large shoebox or a tackle box. Tackle boxes are nice because they are divided into smaller compartments which work well for displaying your rocks as individual specimens. In a shoebox, use the bottom half of an egg carton to store small specimens.
- Always be careful to handle the collection carefully so that rocks don’t bump into each other and cause chipping or breaking. And be careful not to pinch your fingers when putting rocks in or taking them out of the box. If your child is lucky enough to have a delicate specimen such as a nice crystal, she may wish to wrap it in bubble wrap when it’s being stored with the rest of the collection.
- If your child is displaying the rocks on a shelf, be sure it is sturdy enough to support the weight of the rocks, and don’t put the rocks up too high.
- Organize the collection in a way that makes sense to your child. Some collectors keep rocks together by their type (ex. igneous rocks with igneous rocks), while some like to organize them by their size and quality. Others may like to keep local specimens together. Whatever the method, make sure it is one that your child is comfortable using.
- Encourage your child to continue adding to your collection. Some great spots to collect new rocks are museum and zoo gift shops, beaches, mines and quarries which are often open for rock collectors to harvest specimens. Remember not to collect rocks in state or national parks, though as it is illegal.
- Be sure to let your child update her records as soon as she adds a specimen, even if she can’t identify it right away. With a little time and observation, your child can create a collection that will truly rock!
Identifying Rocks
There are thousands of different kinds of rocks on our planet, each one revealing a bit about its history on earth. Geologists classify rocks into three main groups:
- Igneous rocks. These rocks come from melted rock that has cooled and turned into a solid. Some examples include pumice, granite, and basalt.
- Sedimentary rocks. These rocks are created when layers of sediment, usually carried by water, cement together in layers. Some examples are shale and sandstone.
- Metamorphic rocks. These rocks are created when sedimentary or igneous rocks are buried deep within the earth’s crust and are changed by intense pressure. Some examples are gneiss, slate, marble, and quartzite.
Here was some ways that you and your child can identify rocks.
- Make observations about the rock. You can identify a rock by figuring out where it comes from or what color it is.
- Hardness Test: How hard is your rock? Geologists classify rocks by how hard they are to scratch, using a scale from 1 to 10. The softest mineral talc has a hardness of 1 while a diamond, the hardest mineral, has a hardness of 10. You can figure out how hard your rock is by scratching another object against it. For instance, a penny is about the hardness 4. If you scratch the rock on your penny, the rock must be less than 4 hardness, but if the rock can scratch the penny, the rock must be greater than 4 hardness. Experiment by scratching your rock with different objects to see how hard it is.
- The Streak Test: Rub your rock against a piece of unglazed porcelain such as a kitchen or bathroom tile. Does it leave a streak? You can sometimes identify a rock by the color of its streak. This is more accurate than looking at a rock's color which may be affected by impurities.
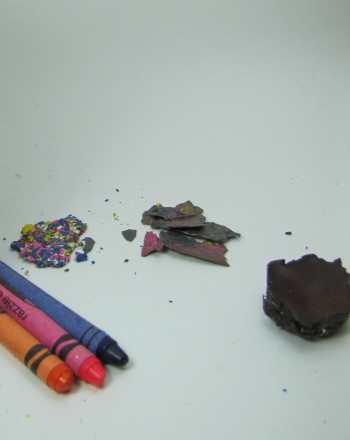
- Cleavage Test: You can sometimes identify a rock by how it breaks, or cleaves. For instance, halite or salt splits into cubes while mica splits into thin sheets.
Identifying rocks can be tricky, but pictures are very helpful. Check out an illustrated rock field guide which you can get at any bookstore, or visit an online gallery such as this one at About.com.
.