Activity
Grafting 101

Grade Level: 8th - 12th; Type: Botany
Objective:
Learn about the process of grafting by grafting branches of one type of fruit tree onto another.
The purpose of this experiment is to graft branches from various different fruit trees onto a root stalk. Though you will not see fruit from these branches until the following year, you will be able to observe whether or not the grafted branches took hold within a few months.
Research Questions:
- How was the process of grafting invented?
- What are the different types of grafts that can be used?
- Why are some types of grafts better than others?
- Why do people use grafting?
- How long does it take a graft to take hold?
It takes a long time to grow a tree from seed to a fruit bearing adult. With some species it can be a few years until they begin to produce fruit, while for others it can be a decade or more. This makes growing trees from seed impractical for many farmers. As an alternative, many farmers use the process of grafting, which is the act of placing the branches of one tree onto the trunk of another and encouraging the two to bind together. Using this process, a grafted branch can often start bearing fruit within one year. Additionally, it allows for multiple types of fruit to grow on the same tree.
Materials:
- An established fruit tree planted in the ground such as an apple or a peach
- Branches from various fruit trees such as peaches, plums, apricots, pears
- A small hatchet
- A knife
- Grafting wax
- Garden clippers
- Wire brads
- A hammer
- A digital camera
You will need access to an established fruit tree. If you do not have one, it may be possible to conduct your experiment at a friend’s or neighbor’s house. Branches for grafting can be collected from friends and neighbors rather than bought at a plant nursery.
Experimental Procedure:
- Select healthy green shoots from various fruit trees that you will graft onto the rootstalk.
- Cut the shoots off the trees with a knife or with garden clippers.
- Place the shoots in a damp pillowcase. You will need to graft them onto the rootstalk on the same day.
- Trim the lower edges of the shoots so that they have a 1 and a half inch wedge. The bark of the shoot should be intact on one side and trimmed away for the length of the wedge on the other.
- Place the shoots back in the damp bag.
- Select a branch close to the trunk of the root stalk that is about 2 inches in diameter and pointing up towards the sky.
- Use a hatchet or saw to chop off this branch.
- Make a 2 inch vertical slit in this branch through the bark.
- Make another 2 inch slit parallel to the first slit and about ¾ of an inch away.
- Gently pull the bark away to create a space between it and the trunk. Do not allow the bark to break off; you will need it to secure the graft.
- Place the shoot in the slit with the trimmed end towards the interior of the tree and the bark end towards the bark of the tree.
- Press the bark of the root graft against the edge of the shoot gently.
- Hammer a wire brad into the bark of the root stalk, the grafted shoot and the trunk of the tree. You may need two to secure the graft.
- Label the grafted branch.
- Repeat steps 8-14 twice more so that three grafted branches are placed at even intervals around the root stalk.
- Pour grafting wax over the top of the rootstalk and the grafts. This will protect them and keep them in place.
- Repeat steps 6-16 with other shoots. Complete three such graftings.
- Observe the grafted branches weekly to find out whether they are taking.
- (optional) Take digital photos of the progress in order to find out how the grafted branches grow over time.
Terms/Concepts: Graft; Root stalk; Propagate; Seed; Germinate
References:
Disclaimer and Safety Precautions
Education.com provides the Science Fair Project Ideas for informational purposes only. Education.com does not make any guarantee or representation regarding the Science Fair Project Ideas and is not responsible or liable for any loss or damage, directly or indirectly, caused by your use of such information. By accessing the Science Fair Project Ideas, you waive and renounce any claims against Education.com that arise thereof. In addition, your access to Education.com's website and Science Fair Project Ideas is covered by Education.com's Privacy Policy and site Terms of Use, which include limitations on Education.com's liability.
Warning is hereby given that not all Project Ideas are appropriate for all individuals or in all circumstances. Implementation of any Science Project Idea should be undertaken only in appropriate settings and with appropriate parental or other supervision. Reading and following the safety precautions of all materials used in a project is the sole responsibility of each individual. For further information, consult your state's handbook of Science Safety.
Related learning resources

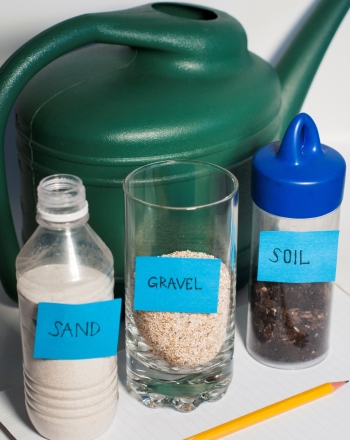
Geology 101
Activity
Geology 101
Take a closer look at the soil that surrounds us, and give your child a lesson in Geology 101!
1st Grade
Science
Activity

101 and Out!
Worksheet
101 and Out!
This printable game, called 101 and Out!, is a great way for kids to practice their place value skills by using a hundreds chart.
2nd Grade
Math
Worksheet
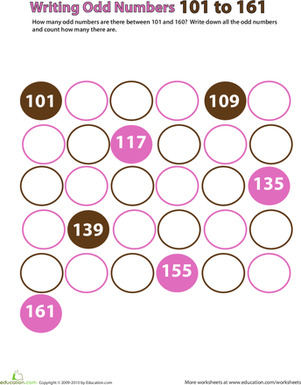
Odd Numbers: 101-161
Worksheet
Odd Numbers: 101-161
In this 2nd grade math worksheet, your child will practice writing odd numbers and counting by 2 from 101 to 161 as they write the missing numbers in the spaces.
2nd Grade
Math
Worksheet